
Face Mask Sewing Tutorial Plus Mask for 14 and 18-inch doll
- Bankky N.

- Apr 30, 2020
- 2 min read
Updated: Jan 11, 2023

Hi, How are you? It's has been a while since the outbreak of the coronavirus— it’s hard for even the most optimistic among us to stay positive but what else can we do right? No matter how dire a situation may be, there are always some positives you can find in it.
It's hard but I will try my best to stay creative... you should too!
Take care, My crafty friends and I hope you like this tutorial.
Video Tutorial

# The free pattern including 4 sizes for Men, Women, kids large and small.

1.Fold the side of pocket 3/8” then fold under again; Press and set aside.

2. Place the pockets pieces right side together stitch along the curved edge. Backstitch at the beginning and end of each line of stitching. Do the same with the outer and inner pieces.

I using Nesting seams technique make sure that your seams are facing in opposite directions at each layer.
3. Working on the right side, Topstitch along the left and right side then topstitch seam line on the pockets pieces, outer and inner pieces.


4.Make a sandwich; Place the inner layer right side out then Pocket piece right side out on top and last outer layer with the right side facing the pocket, Pins matching the seam line.
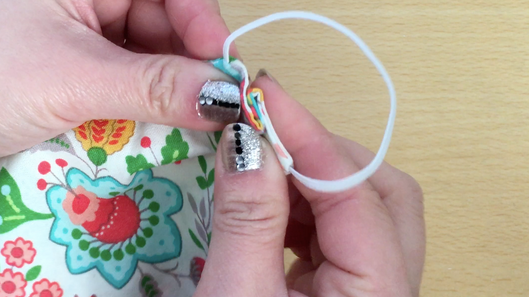
Start at the side the bottom corner of the mask and stitch; Turn and insert elastic and continue stitching until reach next corner again insert elastic and stitch all 4 corners, leaving a little opening.


5. Clip the seam allowance along the curve and corner.

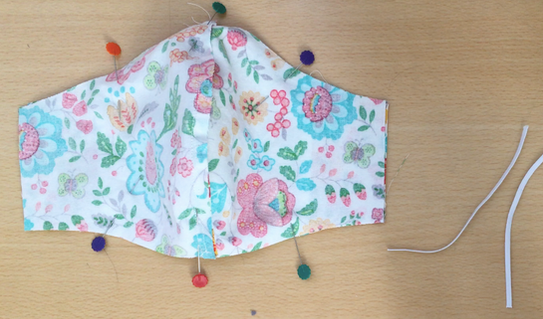
6. Turn right side out through the opening; Press make a pleat on the side and topstitch all around the mask.


***Tip ***
To avoid skipped stitches I make a little teabag with 6 layers from scrap fabric to help sewing with thick bulky seam It’s easy & effective solution. Slip the teabag under the back of the foot and keep sewing .

Doll Face Mask

1.Place the outer pieces right side together stitch along the curved edge. Backstitch at the beginning and end of each line of stitching. Do the same with the inner pieces.

2. Clip the seam allowance along the curve of outer and inner pieces; Press and Fold 1/4” on the side of the mask.

3. Place the outer and inner pieces right side together Pins matching the seam line; stitch top and bottom leaving both sides open for insert elastic.

5. Clip the seam allowance along the curve and corner; Turn sight side out through the opening; Press.

6.Try the mask on the doll then cut elastic long enough from ear to ear; insert elastic on each ends and stitch.


Was this tutorial helpful? Consider buying me a cup of coffee! Venmo Me @Bankky-Nomoto
It will help cover the costs around here and encourage more free pattern and tutorial


