
Doll Sewing 101: Start with the Basics - Episode 1 – Doll Underwear
- Bankky N.
- Aug 24, 2025
- 3 min read

Welcome to Doll Sewing 101: Start with the Basics, a new series designed to guide you through creating essential wardrobe pieces for dolls. If you’ve ever wanted to sew doll clothes but didn’t know where to start, this series is for you!
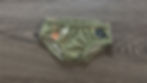
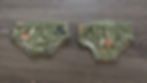
We’ll begin with the foundation of every wardrobe: underwear. In this first episode, I’ll share two free patterns for doll underwear. Each pattern is sewn a little differently—Pattern A uses a back seam, while Pattern B uses side seams—so you can try both and discover which method you prefer.
🎁Free Printable patterns at the bottom of the page!

Supplies You’ll Need
Free Doll Underwear Patterns (A & B) – download link below
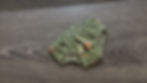
Stretch fabric (cotton knit, jersey, or old t-shirts)
1/8” elastic (buy here)
Threader clip (buy here)
Heat Erasable Fabric Marking Pens (buy here)
Sewing machine (zigzag or stretch stitch recommended)
Scissors
Needle and matching thread
Video Tutorial
Instructions
✂️ Pattern A: Join at the back and crotch
Steps:
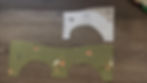
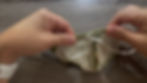
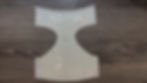
1. Cut the Fabric:

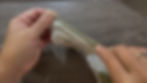
2. Attach Elastic to Leg Openings:


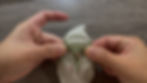
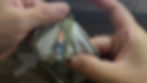
3. Sew the Back Seam:


4. Sew the Crotch Seam:


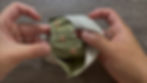
5. Attach Elastic to Waistband:


✂️ Pattern B: Join at the sides
Steps:
1. Cut the Fabric:

2. Attach Elastic to Leg Openings:


3. Sew the Side Seams:


4. Attach Elastic to Waistband:


Tips & Variations
Add lace trim for a girly style.
Use scraps from old baby clothes for soft, stretchy fabric.
Sew a whole collection in different prints and colors.
This is Episode 1 of Doll Sewing 101: Start with the Basics. By sewing underwear first, you’re giving your doll’s wardrobe the same foundation we all need.
Stay tuned for Episode 2, where we’ll move on to the next essential piece in the doll wardrobe.
💡 Share your creations with #happybankkycraftymom so I can see your doll sewing journey!
I hope you enjoyed this tutorial! See you in the next one—happy crafting!

Was this tutorial helpful? Consider buying me a cup of coffee!
It will help cover the costs around here and encourage more free patterns and tutorial

PATTERNS POLICY
Please feel free to use the patterns as you like and you don’t have to to give me any credit if you don’t want to, I just want to create patterns that are free and available for everyone, It’s will be my Honor if my creativity can be helpful to you in any way☺️
Free Printable pattern Here!

Thanks for stopping by
and allowing me to share a little of my passion
I Hope You Have a Lovely day!
And don't forget to Do more of what makes you happy!
HAPPY BANKKY / CRAFTY MOM