
Fabric, embroidery and crochet dolls Padded Hanger
- Bankky N.

- Feb 26, 2020
- 3 min read
Updated: Jan 11, 2023

Hangers are absolutely necessary for a closet. I have searched for some tutorial hangers online but not so many options out there so, I decided to make my own. I hope you guys like it and thanks again for coming (^_^)

Video Tutorial
1. Cut steel wire 3” long then bend the wire I use small glue stick as a guide.
Use large popsicle stick 3/4” wide 6” long, Draw the line in the middle then measure 1/4” away from the middle line left and right to create a triangle; cutaway along the line.


2. Wrap the wire with the ribbon start at the tip with a little glue to attach the ribbon and continued to wrap it all along the neck to cover all the exposed wire.
Take another piece of the same ribbon and make a little bow, set aside.

3. Use large popsicle stick 3/4” wide 6” long, Draw the line in the middle then measure 1/4” away from the middle line left and right to create a triangle; cutaway along the line.


4. Cut cereal Boxes trace shape of the hanger then cut out 2 pieces use hot glue connecting popsicle and wire together to make the hanger.


5. Cut quilt batting into 1” strips use hot glue and wrap it around hanger; set aside


Make fabric Embroidery hanger
6. Cut the fabric on fold big enough as the pattern; Trace all the marking point


7. Embroidery flower and leaves

8. Working on the wrong side pin and stitch 1/4” away from marking along the line.


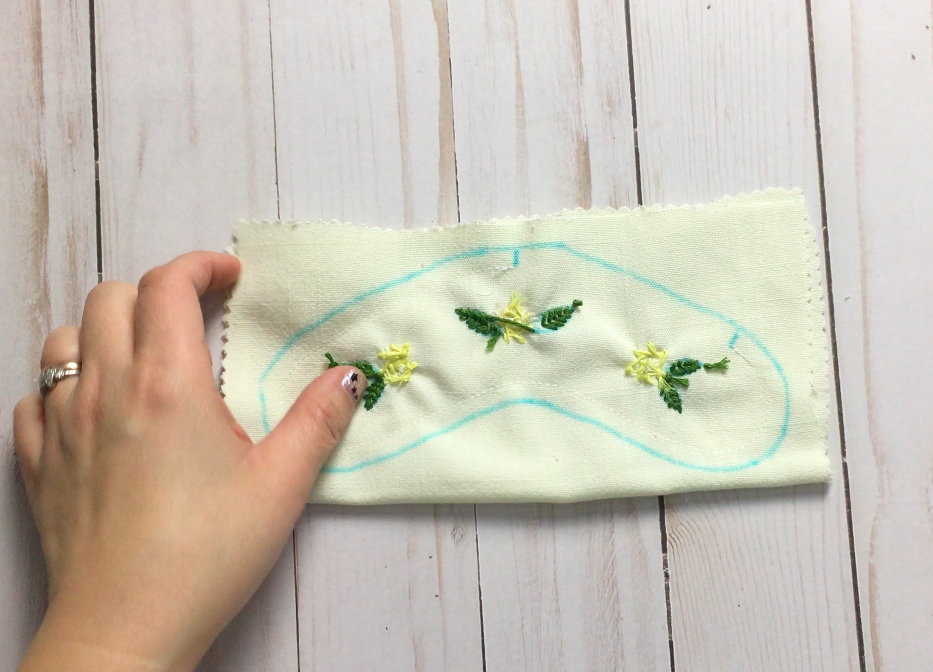


9. Trim along pattern line; clip the curve and press the opening downward.


10. Turn the right side out and put the hanger into the cover.


11. Slip stitch to close the opening then sew little bow for finishing touches.


Now, the cute little padded hanger is Done!


Crochet hanger
I use Lilly cotton yarn and (E) 3.5 mm crochet hook size.
1. Foundation chain 15
Row 1: ch 1, sc into each chain across
Row 2 - 30:ch 1, turn, sc into each stitch across.


2. Find the middle part of the piece pokes the hole for the hanger to go through.

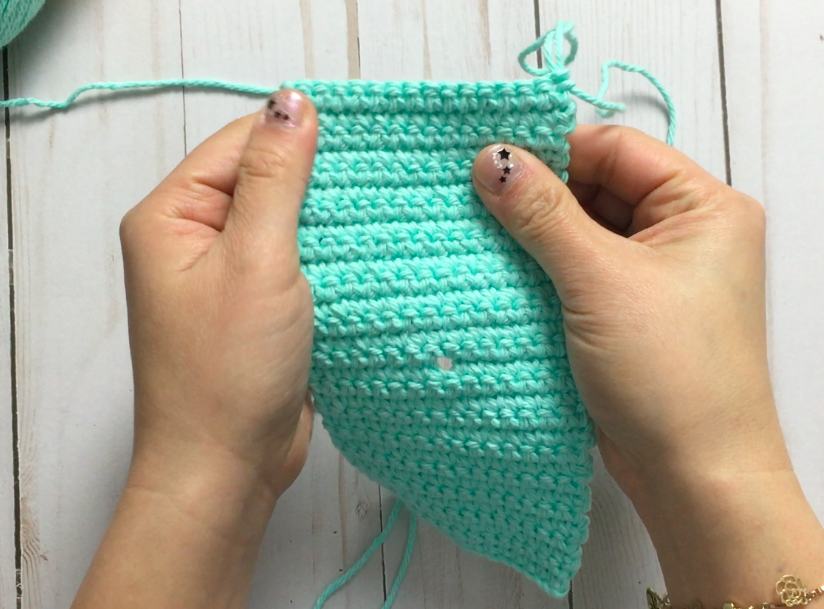
3. Fold and Join the side, sl st start from the corner of your work; do the same to another side. Cut the yarn long enough to weave in the ends; turn inside out.


4. Put the hanger inside the crochet cover then sew bottom part together using whip stitch; weave in the end.


This project was so easy to make I ended up making 20 of these hangers in 3 days!
Leaves and a little rose
foundation row chain 5
1st row: ch2, sc, hdc, dc, hdc, sc ; repeat for 2nd leaves.

Rose foundation row chain 5
(ch2, hdc, ch2, sl st) (ch2, dc, ch2, sl st ) (ch3, dc, ch3, sl st )
(ch3, 2dc, ch3, sl st ) (ch3, 2dc, ch3, sl st) Roll the rose ans sew it through the bottom.


sew everything together and you're done!


which one Do you like best? I really can't decide!
This project so easy to make I ended up making 20 of these hangers in 3 days!
Was this tutorial helpful? Consider buying me a cup of coffee! Venmo Me @Bankky-Nomoto
It will help cover the costs around here and encourage more free patterns and tutorial


