top of page

🪿✨DIY Porch Goose Bonnet Sewing Tutorial Free Pattern for 17” & 23” Geese

Writer: Bankky N.
Bankky N.
50 minutes ago
3 min read

Today we’re making a sweet little bonnet for your porch goose! 🎀

This bonnet has a classic brim, ribbon ties, and a fully lined finish. It’s such a cute way to dress up your porch goose for spring, summer, fall, holidays, or really any time you want to give your goose a new look.

This tutorial is made specifically for 17-inch and 23-inch porch geese.


🎁Free Printable patterns and video tutorial at the bottom of the page!


🧵 Materials You’ll Need

  • Outer fabric

  • Lining fabric

  • Ribbon for the ties

  • Matching thread

  • Scissors

  • Pins or sewing clips

  • Iron

  • Sewing machine

  • Porch goose bonnet pattern


Print and cut out the pattern pieces
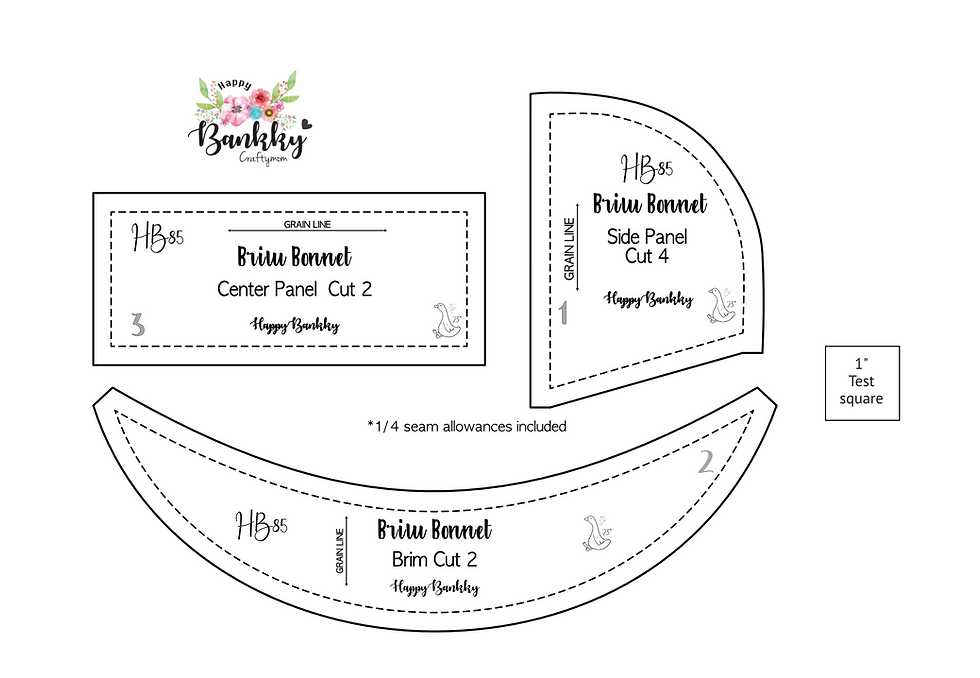

🪡 Cutting Guide
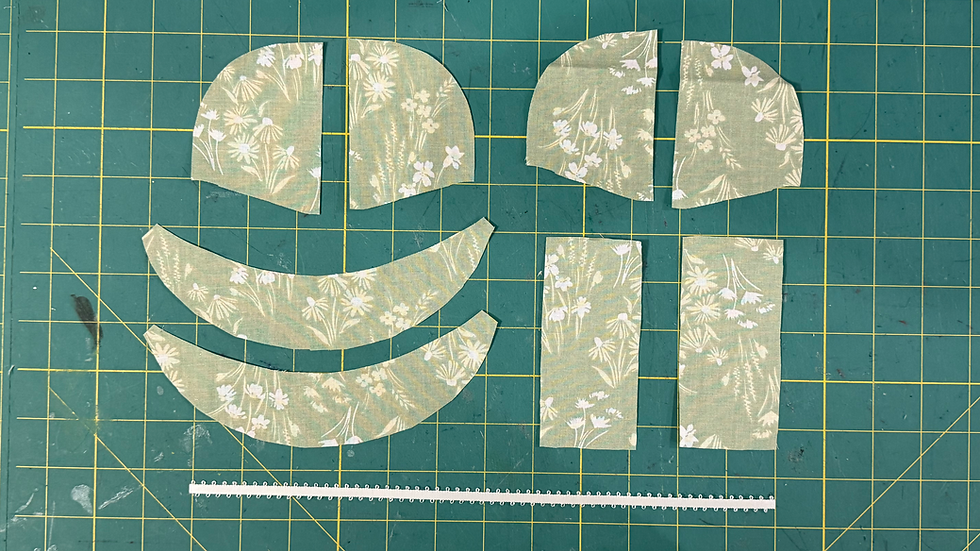


Step-by-Step Porch Goose Bonnet Tutorial


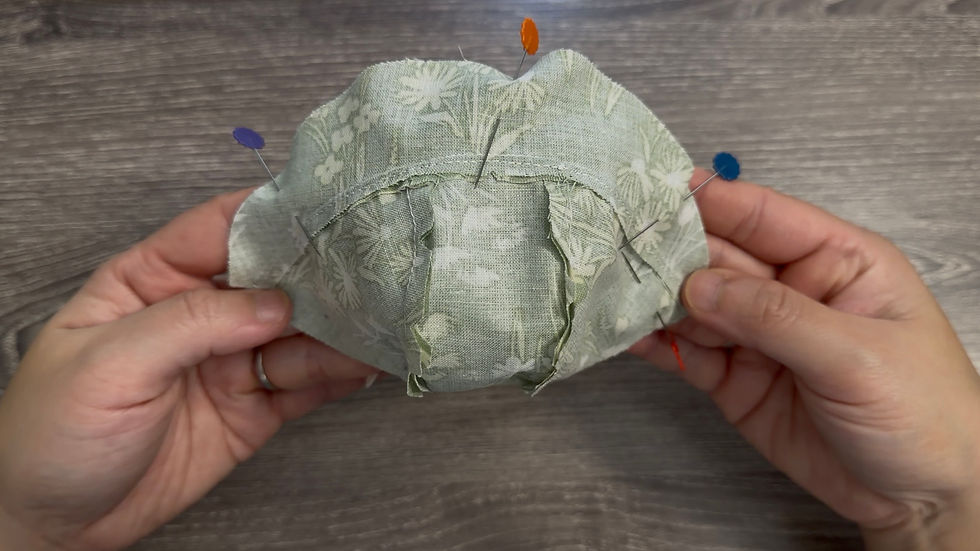
Step 1: Sew the Side Panels to the Center Panel


With right sides together, pin side panels to the center panel.

Stitch along the curved seams.

Repeat the other side.
Try to keep the edges lined up evenly as you sew around the curves.


Step 2: Clip the Curves


Clip small notches into the curved seam allowance. Be careful not to cut through your stitching.

Clipping the curves helps the bonnet sit smoothly once it is turned and pressed.


Step 3: Attach the Brim


With right sides together, pin the brim to the front edge of the bonnet.


Stitch the brim in place. Make sure the center of the brim lines up nicely with the center of the bonnet.


Step 4: Topstitch the Seam Allowance


Fold the seam allowance toward the bottom of the bonnet.

Topstitch close to the seam.

This helps the brim stay neat and gives the bonnet a nice finished look.


Step 5: Add the Ribbon Ties


Stitch the ribbon to the ends of the bonnet.

Make sure the ribbon is securely attached.


Step 6: Make the Lining


Repeat the same steps for the lining.

Sew the side panels to the center panel, clip the curves, attach the brim, and topstitch the seam allowance.


Step 7: Join the Outer Bonnet and Lining


Place the outer bonnet and lining right sides together.


Pin around the edges. Make sure the ribbon ties are tucked safely inside so they do not get caught while sewing.


Step 8: Stitch Around the Bonnet


Stitch around the bonnet, leaving about a 1½-inch opening for turning.

Backstitch at the beginning and end of the opening.


Step 9: Trim and Clip


Trim the corners to reduce bulk. Clip around the curved brim so the bonnet will turn smoothly.


Step 10: Turn Right Side Out


Carefully turn the bonnet right side out through the opening.


Gently push out the corners and shape the brim.

Step 11: Finish the Ribbon Ties

Cut the ribbon in half to create one tie on each side.

Carefully heat-seal the cut ends with a lighter to help prevent fraying.


Step 12: Press the Bonnet


Press the bonnet nice and flat.


Step 13: Edge-Stitch


Edge-stitch all around the bonnet.

This closes the turning opening and gives the bonnet a neat finished edge.

And that’s it! Your porch goose bonnet is finished. 🎀


Make It Your Own

One of my favorite things about this bonnet is how different it can look depending on the fabric you choose.

Try floral fabric for spring, gingham for summer, warm plaids for fall, or festive prints for the holidays.

It’s a simple little accessory, but it can completely change the look of your porch goose outfit.


🎥 Watch the Video Tutorial


I hope you enjoyed this tutorial! See you in the next one—happy crafting!


Was this tutorial helpful? Consider buying me a cup of coffee!

It will help cover the costs around here and encourage more free patterns and tutorial


17”Porch Goose Free Printable pattern Here!


23”Porch Goose Free Printable pattern Here!


PATTERNS POLICY

Please feel free to use the patterns as you like and you don’t have to to give me any credit if you don’t want to, I just want to create patterns that are free and available for everyone, It’s will be my Honor if my creativity can be helpful to you in any way☺️


Thanks for stopping by

and allowing me to share a little of my passion

I Hope You Have a Lovely day!

And don't forget to Do more of what makes you happy!

HAPPY BANKKY / CRAFTY MOM

Don't Miss Out

Sign Up For More Craft Project!

©2024 by HAPPY BANKKY / CRAFTY MOM created with Wix.com

bottom of page