top of page

🪿✨ Porch Goose Series: EP. 2 Easy Elastic Neckline Goose Dress

  • Writer: Bankky N.
    Bankky N.
  • 11 hours ago
  • 3 min read

There’s just something so heartwarming about a dressed-up porch goose 🥹💕

It brings personality, charm, and a little bit of joy to your home.


This Easy Elastic Neckline Goose Dress is a simple beginner-friendly sewing project for dressing up your porch goose! 🪿💕 The gathered elastic neckline makes the dress easy to slip on and off, and the same sewing method works for both the 17-inch and 23-inch porch goose.


🎁Free Printable patterns & Video tutorial at the bottom of the page!


Porch Goose Series tutorials


🧵 Materials You’ll Need


• Fabric

• Elastic (for neckline)

• Yarn or ribbon

• Sewing machine

• Thread

• Pins or clips

• Iron


Video Tutorial


Print and cut out the pattern pieces in the correct size for your goose.


🪡 Cutting Guide


🪿 Instructions:


Step 1 – Press the Neckline & Bottom Hem


Following the markings on the pattern, press the neckline and bottom hem toward the wrong side of the fabric.

Pressing these folds before sewing will make the following steps easier and help give your finished dress a clean look.


Step 2 – Sew the Back Seam


Fold the dress with right sides together and line up the back edges.

Sew the back seam, leaving approximately ½" unstitched at the top. This small opening will be used later to insert the neckline elastic.
Snip the seam allowance before finishing the seam.
For a cleaner finish, you can optionally finish the raw seam allowance with a serger, overlock stitch, or zigzag stitch to help prevent fraying.


Step 3 – Make the Elastic Neckline Channel


Using the neckline fold you pressed earlier, fold the neckline toward the wrong side of the dress.


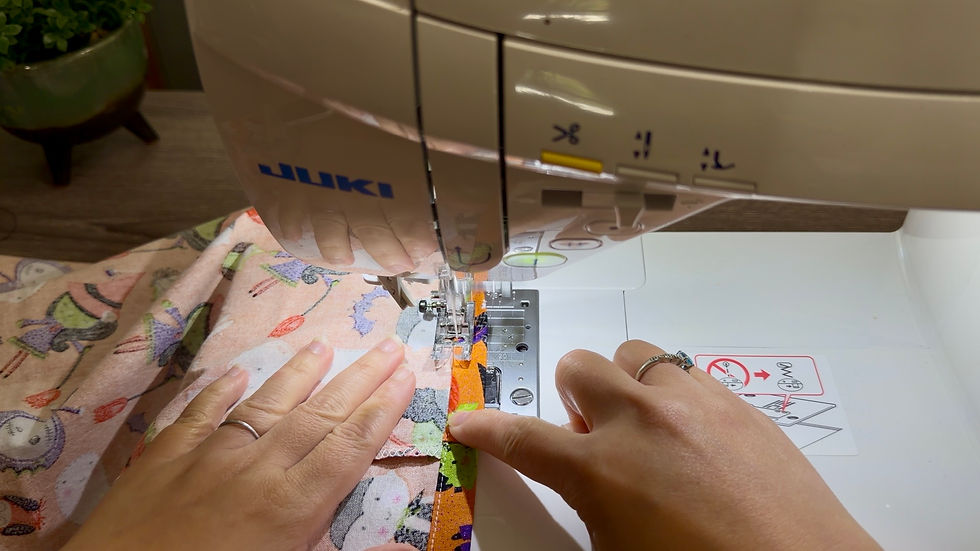
Stitch around the neckline close to the folded edge to create a channel for the elastic.


Step 4 – Hem the Bottom


Using the fold you pressed earlier, turn the bottom hem toward the wrong side of the fabric.


Stitch around the entire bottom of the dress to secure the hem.

After hemming.
After hemming.


Step 5 – Insert the Elastic


Cut the elastic according to your porch goose size:

- 17" Porch Goose – Cut 7" elastic

- 23" Porch Goose – Cut 9" elastic


Attach a safety pin or elastic threader to one end of the elastic.
optional using the clip to hold down the other end of elastic.

Feed the elastic through the opening at the back and carefully work it all the way around the neckline channel.


Step 6 – Join the Elastic


Make sure the elastic is not twisted. Overlap the two ends and stitch them securely together to form a ring.

 You can use sewing machine or hand stitch the ends together.
 You can use sewing machine or hand stitch the ends together.

Gently stretch the neckline and distribute the gathers evenly around the dress.

Done!
Done!

Your Easy Elastic Neckline Goose Dress is finished!


Slip it onto your porch goose, adjust the gathers, and you're ready to dress your goose for any season or holiday.

Make sure to make the matching bow to go with it ^-^


I hope you enjoyed this tutorial! See you in the next one—happy crafting!


Was this tutorial helpful? Consider buying me a cup of coffee!

It will help cover the costs around here and encourage more free patterns and tutorial

17”Porch Goose Free Printable pattern Here!

23”Porch Goose Free Printable pattern Here!


PATTERNS POLICY

Please feel free to use the patterns as you like and you don’t have to to give me any credit if you don’t want to, I just want to create patterns that are free and available for everyone, It’s will be my Honor if my creativity can be helpful to you in any way☺️


Thanks for stopping by

and allowing me to share a little of my passion

I Hope You Have a Lovely day!

And don't forget to Do more of what makes you happy!

HAPPY BANKKY / CRAFTY MOM

Don't Miss Out

Sign Up For More Craft Project!

©2024 by HAPPY BANKKY / CRAFTY MOM created with Wix.com

bottom of page