top of page

Doll Sewing 101: Start with the Basics Episode 7 - Basic Drop Waist Gather Skirt

  • Writer: Bankky N.
    Bankky N.
  • 4 hours ago
  • 4 min read

Welcome back to Doll Sewing 101: Start with the Basics! 🧵💕

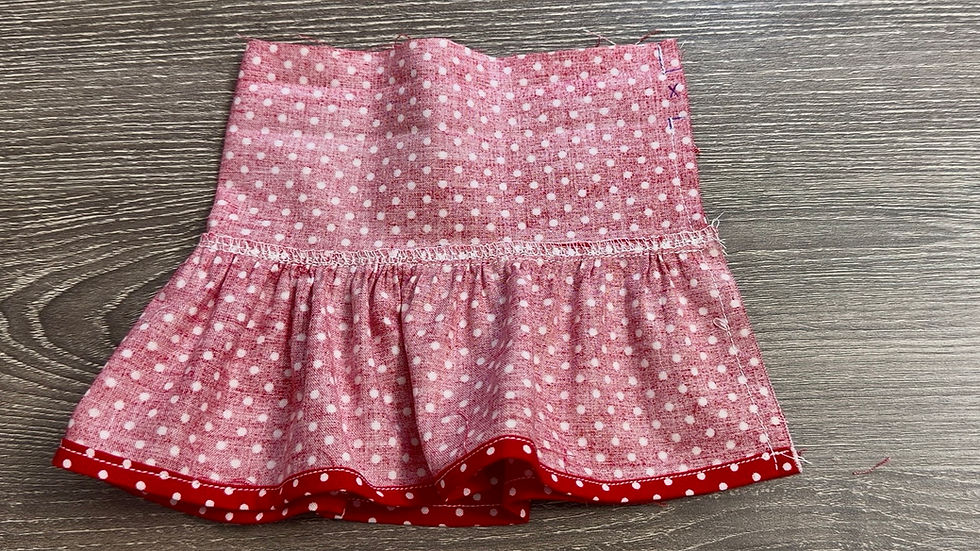
For Episode 7, we’re making a Basic Drop-Waist Gathered Skirt!

This skirt is a fun next step if you’ve been following along with my Doll Sewing 101 series. Instead of gathering the skirt directly at the waist, this design has a smooth Skirt Yoke at the top with a gathered Skirt Ruffle attached lower down It gives the skirt a cute, full look while still being simple enough for beginners.


The pattern includes sizes for:

  • 18-inch dolls

  • 14-inch dolls

  • 6-inch dolls


And, as always, the pattern is FREE! 💕✂️


🎁Free Printable patterns at the bottom of the page!


Pattern pieces


For 18 inch doll.
For 18 inch doll.

For 14 inch Doll.
For 14 inch Doll.

For 6 inch Doll.
For 6 inch Doll.

🧵 Materials


You will need:

  • Fabric

  • Matching thread

  • Elastic

  • Sewing machine

  • Scissors

  • Pins or sewing clips

  • Safety pin or elastic-threading tool

  • Iron

  • Serger/overlock machine – optional


📺 Watch the Full Video Tutorial


✂ Cutting Guide


Step-by-Step Sewing Instructions


Step 1 – Press the Hem & Waistband


Following the markings on the pattern, press and fold the bottom hem of the Skirt Ruffle toward the wrong side

Also press and fold the waistband on the Skirt Yoke toward the wrong side.

Doing this before you begin sewing makes both areas much easier to finish later.


Step 2 – Hem the Skirt Ruffle


Stitch along the folded edge of the Skirt Ruffle to secure the hem.


Your ruffle hem is now finished and ready for gathering.


Step 3 – Sew the Gathering Stitches


Set your sewing machine to a long stitch length.

Sew two rows of gathering stitches along the top edge of the Skirt Ruffle.

Do not backstitch at the beginning or end. Leave long thread tails so you can easily pull the threads to create the gathers.


Step 4 – Gather & Pin the Ruffle


With right sides together, pin or clip the top edge of the Skirt Ruffle to the bottom edge of the Skirt Yoke.
Gently pull the gathering threads to gather the fabric.
Continue adjusting the gathers until the ruffle fits the Skirt Yoke.


Step 5 – Attach the Ruffle


Stitch the gathered Skirt Ruffle to the Skirt Yoke.
As you sew, make sure the gathers stay evenly distributed and the fabric underneath remains smooth.


Step 6 – Finish the Seam


Remove the gathering stitches.

Finish the raw seam allowance with a serger, overlock stitch, or zigzag stitch to help prevent the fabric from fraying.


Step 7 – Topstitch the Skirt Yoke


Fold the seam allowance up toward the waistband. Topstitch along the Skirt Yoke close to the seam.

This holds the seam allowance in place and gives the skirt a nice finished look.


Step 8 – Sew the Back Seam


Fold the skirt in half with right sides together, matching the back edges.

Sew the back seam, leaving approximately ½ inch open at the top. You will use this opening to insert the elastic later.
Optional: Finish the raw edge of the back seam with a serger, overlock stitch, or zigzag stitch.


Step 9 – Make the Waistband Casing


Fold the previously pressed waistband toward the wrong side of the skirt.

Pin
Pin
 Stitch around the folded edge to create the elastic casing.
 Stitch around the folded edge to create the elastic casing.


Step 10 – Insert the Elastic


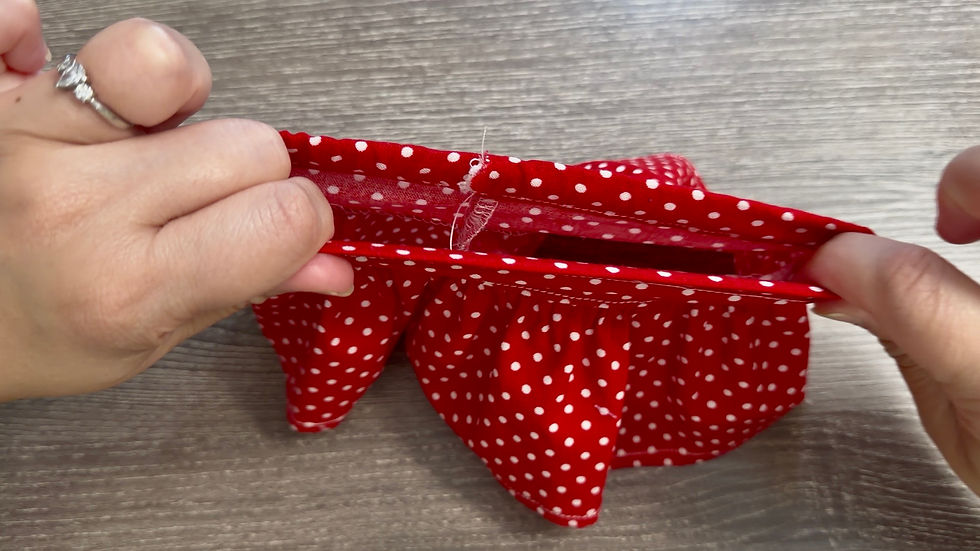
Using a safety pin or elastic-threading tool, guide the elastic through the waistband casing.

Use the elastic length for your doll size:

18" Doll – 10"

14" Doll – 6½"

6" Doll – 4"

Be careful not to let the other end of the elastic disappear inside the casing!


Step 11 – Finish the Waistband


Before joining the elastic, make sure it is not twisted inside the waistband. Overlap the two ends
stitch them securely together by machine or hand.

Gently stretch the waistband several times to pull the elastic into the casing and evenly distribute the gathers around the waist.


Your Drop-Waist Gathered Skirt Is Finished! 🎉


That’s it! Your Basic Drop-Waist Gathered Skirt is ready for your doll. 🧵💕

Once you understand the basic construction, this is such a fun skirt to customize. Try different prints, seasonal fabrics, lace, trims, or contrasting fabrics for the Skirt Yoke and Skirt Ruffle.

You can make a whole collection of little skirts using the same basic pattern!


Was this tutorial helpful? Consider buying me a cup of coffee!

It will help cover the costs around here and encourage more free patterns and tutorial


18" dolls Free Printable pattern Here!


14" dolls Free Printable pattern Here!


6” dolls Free Printable pattern Here!


PATTERNS POLICY

Please feel free to use the patterns as you like and you don’t have to to give me any credit if you don’t want to, I just want to create patterns that are free and available for everyone, It’s will be my Honor if my creativity can be helpful to you in any way☺️


Thanks for stopping by

and allowing me to share a little of my passion

I Hope You Have a Lovely day!

And don't forget to Do more of what makes you happy!

HAPPY BANKKY / CRAFTY MOM

Don't Miss Out

Sign Up For More Craft Project!

©2024 by HAPPY BANKKY / CRAFTY MOM created with Wix.com

bottom of page